How to choose between indoor and outdoor LED stage lights is not just a question of brightness. The venue changes what a fixture must withstand, how its beam behaves, and how safely it can be installed. A compact theater may need quiet cooling, controlled spill, and accurate color on faces. An outdoor stage may need stronger output, weather-resistant construction, and dependable connections. The difference becomes clear when wind moves a cable or a dark backdrop absorbs the light.
Lighting author and educator Richard Cadena has written extensively about entertainment-lighting technology. A practical paraphrase of his venue-focused approach is: “Choose for the room, not just the fixture’s specifications.” Treat that as a useful reminder, not a direct quotation. Output numbers matter, but they cannot tell you whether a fixture suits your site.
This guide will compare indoor and outdoor requirements, including brightness, beam angle, color quality, cooling, protection, and power planning. It will also help you match fixtures to venue size, audience distance, and production needs. Look closely at the actual setting: a low ceiling, nearby windows, damp air, or a long throw can change the choice. There is no perfect fixture for every stage. And specifications can mislead. A careful decision starts with the conditions on site, then checks the equipment against them.
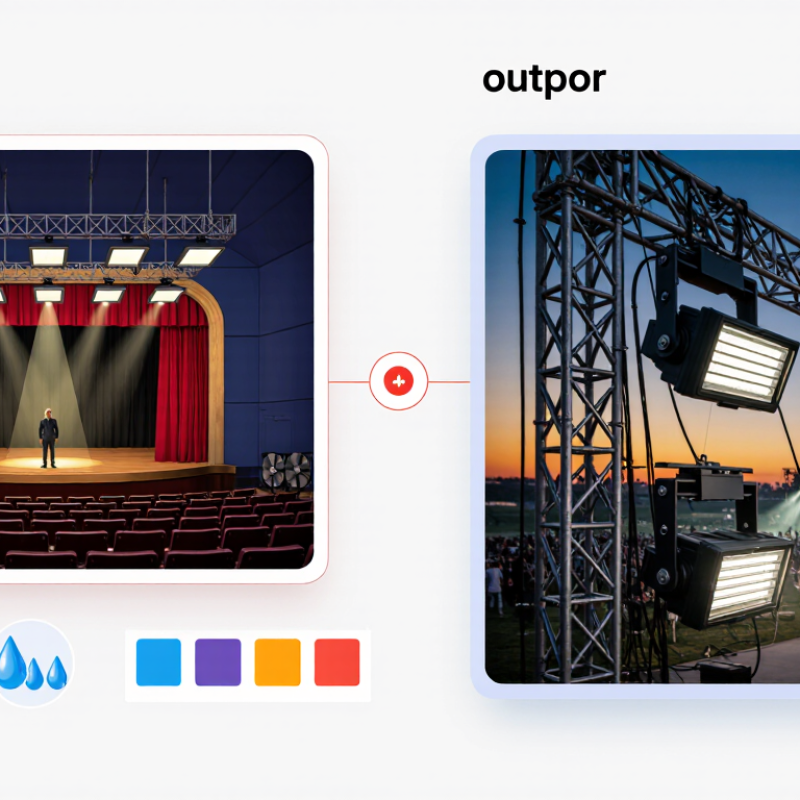
Start with the venue, not the fixture list. In a black-box theater, dark walls can absorb light, while pale walls may bounce it onto performers. Measure the stage width, ceiling height, and distance from the lights to the back row. For outdoor events, check daylight, rain exposure, dust, wind, and available power. A bright afternoon needs more output than a night performance. Check each fixture’s weather-protection rating and operating limits; a cover alone does not prove it is suitable.
Consider what the audience must see: faces, movement, costume color, or a wide scenic wash. Close audiences may notice glare and harsh beams, while distant seats need enough intensity and clear contrast. For spoken theater, natural skin tones and quiet transitions often matter more than maximum brightness. For concerts, moving beams can add energy, but haze and sightlines change how they look. Test from audience level.
Match beam angle, color mixing, control options, and power draw to the actual show. Confirm mounting points and cable routes with the venue team, especially outdoors. It is easy to overlook reflections: an empty room can make a setup look perfect, then pale walls distract once the space fills. Mark the farthest throw during a site visit, and check shadows on performers’ faces during rehearsal.
| Venue Type | Typical Audience and Viewing Distance | Environment to Assess | Lighting Requirements | Practical Fixture Selection | Checks Before Purchase or Rental |
|---|---|---|---|---|---|
| Small indoor room Club, studio, or community hall |
Dozens to a few hundred people; often within roughly 5–15 m of the stage | Low ceiling, nearby walls, reflective surfaces, limited rigging positions, and possible haze restrictions | Controlled coverage, moderate output, smooth dimming, and manageable glare for a close audience | Compact LED wash fixtures with adjustable beam angles; add a small number of spot fixtures for performers or scenic details | Confirm ceiling load and mounting points, power availability, ventilation, noise, and whether the venue permits haze |
| Theater or auditorium | A few hundred to around 1,500 people; seating may extend 10–30 m or more from the stage | Dark audience area, defined stage positions, overhead bars, and sightlines from multiple seating sections | Even face lighting, repeatable focus, accurate color rendering, quiet operation, and controlled spill onto the audience | Use profile or spot fixtures for defined areas and LED washes for broader coverage; select beam angles to suit mounting height and throw distance | Check fixture photometric data, color quality, fan noise, DMX or network compatibility, and rigging and electrical limits |
| Large indoor arena | Thousands of people; long throws and steep or widely distributed seating are common | High trusses, long cable runs, bright video displays, and multiple audience sightlines | High-output beams, consistent coverage at distance, reliable effects, and coordinated lighting control | Consider narrow-beam or long-throw fixtures for distant targets and wider washes for stage coverage; use photometric plans to determine quantities and aiming | Verify throw distance, output at the target, rigging capacity, circuit loading, data distribution, and backup or fallback control plans |
| Covered outdoor stage | From a small event to several thousand people; audience distance varies with stage layout | Wind-driven rain, humidity, dust, temperature changes, and exposure at stage edges or cable connections | Weather-appropriate equipment, secure mounting, adequate output to compete with ambient light, and protected power and data connections | Choose fixtures with an ingress protection rating suitable for the actual exposure; an IP65-rated fixture is commonly specified for dust and water-jet protection, subject to manufacturer instructions | A roof does not guarantee dry conditions. Check the fixture rating, connectors, covers, drainage, wind limits, and local electrical and rigging requirements |
| Open-air outdoor stage Festival, public event, or temporary performance area |
Hundreds to tens of thousands of people; front-of-house distances can be long | Rain, dust, direct sun during setup, wind, changing temperatures, and limited shelter for equipment | Weather-rated fixtures and connections, strong output for long throws, robust mounting, and a plan for safe operation in changing conditions | Select fixtures rated for the expected exposure and use beam and output data to plan coverage; protect power distribution and control equipment as required | Review manufacturer limits for rain, temperature, and wind; use qualified crew for electrical protection, grounding, rigging, and weather monitoring |
| Hybrid or touring production Multiple venues on one tour |
Audience size and viewing distances change from venue to venue | Different roof heights, rigging positions, power systems, local weather, and venue access | Flexible coverage, consistent control, quick setup, and equipment choices that match both indoor and outdoor conditions | Build a rig around documented photometrics, control compatibility, and appropriate environmental ratings; adapt fixture count and aiming to each venue | Prepare venue-specific plots and power plans; confirm local rules and never assume an indoor-rated fixture is suitable for outdoor exposure |
Planning note: Audience capacities and viewing distances are indicative examples, not fixed design limits. Final fixture quantities, beam angles, output, and weather protection should be determined from the venue dimensions, manufacturer photometric data, exposure conditions, and applicable safety requirements.
Indoor fixtures often prioritize low weight, quiet cooling, and color control. Outdoor fixtures need sealed construction, weather protection, and stable mounting.
No. It can resist dust and water jets, but submersion is not covered. Check the rating and installation conditions.
A 10–20-degree beam creates sharp shafts or highlights one performer. A 40–60-degree beam spreads light across curtains or a small stage.
RGBW fixtures can produce richer whites than basic RGB units. Amber can warm skin tones and wooden scenery. Test faces in person.
No. Beam angle, throw distance, and fixture placement matter too. Test the light at the real stage distance, not just indoors.
Test signal reliability at the venue. Confirm the fixture supports the control method already used by the production team.
Check operating temperature, secure connectors, airflow, and mounting space. Leave room for maintenance. I once underestimated heat clearance, and output faded.
Choose colors that suit the performance instead of using every preset. Too many options can make a scene confusing. Less can work.
Choosing the right stage lighting begins with understanding the venue, audience size, and performance needs. How to choose between indoor and outdoor LED stage lights depends on where they will be used and the conditions they must handle. Indoor fixtures can prioritize precise color and beam control, while outdoor models may need stronger weather protection, stable operation across changing temperatures, and suitable safety features. Compare brightness, power requirements, build quality, and operating limits before deciding.
Next, match beam angles, color options, and control methods to the stage design and show schedule. Consider how fixtures will be mounted, accessed, and maintained, as well as the availability of power and control connections. A practical choice balances initial cost with installation effort, energy use, expected service life, and maintenance needs. Reviewing these factors together helps create a reliable lighting setup that suits the venue and supports consistent performances over time.

 Senning Lights